Tackling rugged, rocky trails demands more than just enthusiasm and a full water bottle. Sharp rocks, loose talus, and unpredictable footing can turn a beautiful hike into a painful ordeal if you’re not properly equipped. Smart hikers know that the right gear—boots that grip, poles that steady, helmets that protect, transforms challenging terrain into an adventure you can handle with confidence and safety.
1. Footwear that actually bites rock (and fits)
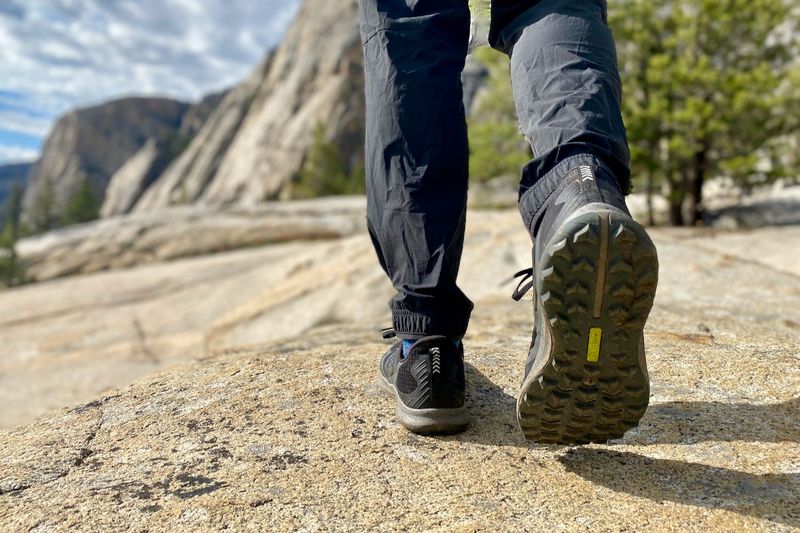
On steep, uneven stone, your shoe’s outsole compound and lug pattern matter as much as the upper. Sticky rubber compounds like Vibram’s MegaGrip are engineered for wet and dry rock traction plus durability. Look for well-spaced, multi-directional lugs that shed grit yet keep surface contact on slabby stone.
Fit is non-negotiable: your heel should lock, your forefoot shouldn’t slosh on side-hills, and toes need downhill room. For the roughest days with heavier packs, traditional hiking boots add structure.
For nimble edging and smearing on rock, consider approach shoes—a climbing-inspired hybrid. If your routes mix talus with short scrambles, an approach shoe with a climbing-style rand and flatter forefoot can feel magic on rock.
2. Adjustable trekking poles (your four-wheel drive)
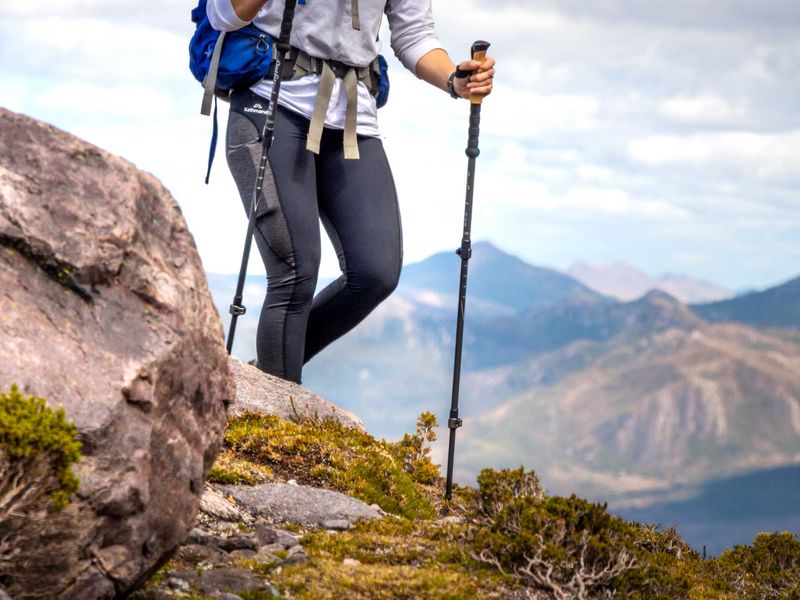
Good poles reduce knee load on descents and improve balance when you’re stepping from boulder to boulder. Lab and field research shows meaningful reductions in knee joint forces when using poles, especially going downhill, when sized correctly. Your elbow should sit at roughly 90 degrees on flat ground.
How to set them: Lengthen five to ten centimeters for steep downhills so you can plant tips slightly ahead for braking. Shorten a touch for climbs to drive through straps without shrugging your shoulders.
Proper adjustment transforms poles from awkward sticks into genuine support that keeps you upright and confident across tricky, uneven ground.
3. Rock-and-ice insurance: microspikes
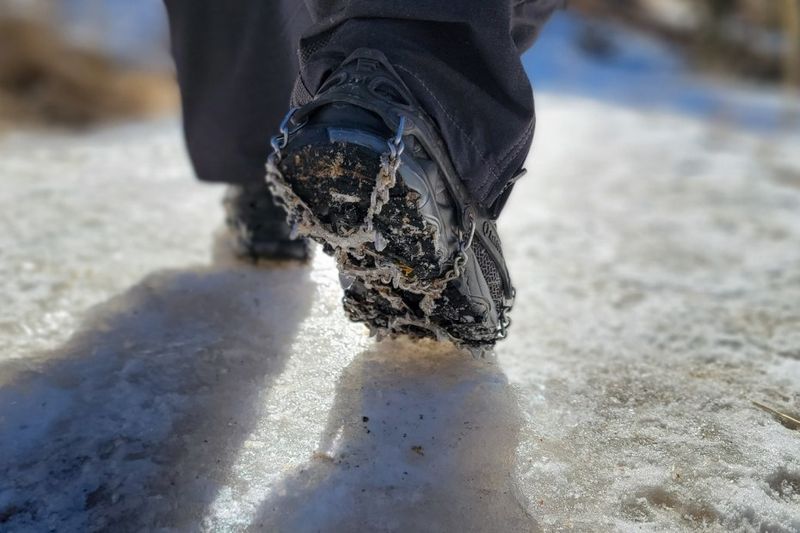
Early-season snow patches, glazed spring melt, or shaded ledges can turn a hike into a slip-n-slide. Compact traction like Kahtoola Microspikes or Hillsound Trail Crampon-style devices add bite on hard snow and ice but aren’t substitutes for real crampons on steep, technical ice.
Choose models that secure well to your footwear and stow flat when you hit dry rock. They’re light enough to carry just in case but robust enough to save you from a dangerous tumble.
When conditions call for it, slipping these over your boots takes seconds and delivers instant confidence on sketchy, frozen surfaces.
4. A climbing helmet for scramble-prone routes
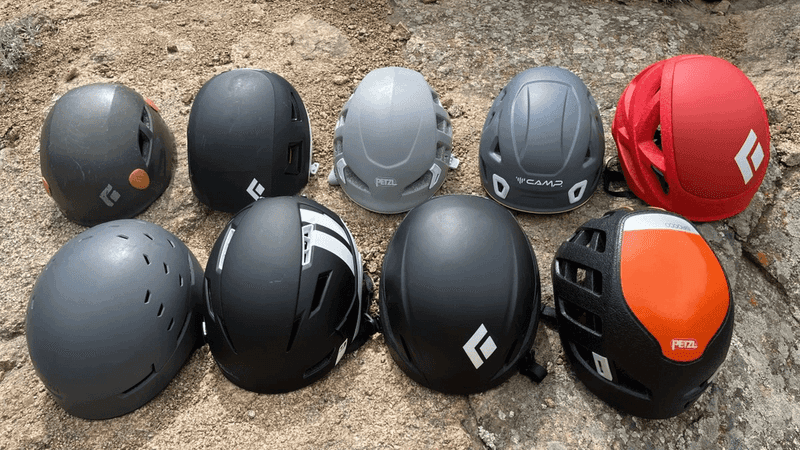
If your line includes chutes, gullies, or sustained scrambling—areas with rockfall potential from hikers above—wear a climbing helmet. These are designed to protect against falling debris and impacts common in technical terrain, unlike bike helmets which are tuned for different crash dynamics.
National-park and backcountry sources consistently recommend helmets where rockfall or exposure exists. A lightweight model won’t weigh you down but can literally save your life.
Don’t skip this piece of gear when the terrain gets serious. Your head is irreplaceable, and rocky trails can surprise you with loose stones tumbling from above.
5. Gloves that grip (and save skin)
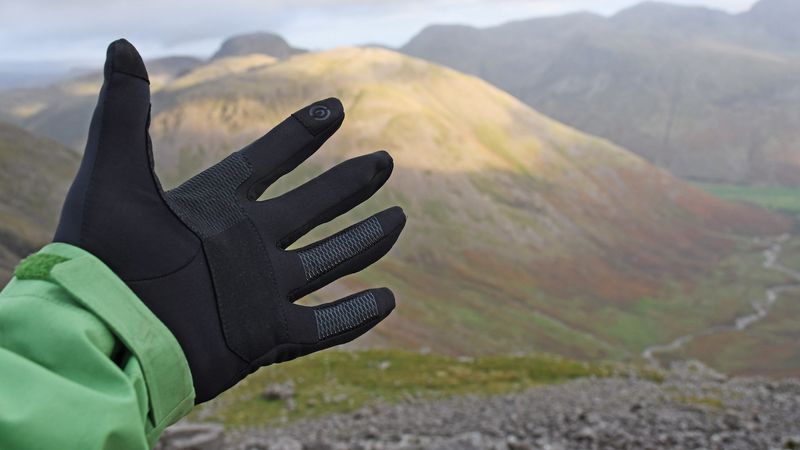
Lightweight leather or synthetic-leather gloves with grippy palms protect hands on sharp rock, keep you from death-gripping chains or cables, and add confidence when palming down slabs. On colder starts, swap to a softshell glove you can still feel rock through. Choose snug, not tight, so you keep dexterity.
Why it helps: Better hand friction equals less lower-body wobble when you’re moving three points on in scramble sections. Your hands become reliable anchors instead of scraped, sweaty liabilities.
A good pair transforms nerve-wracking handholds into comfortable, controlled moves across exposed terrain.
6. Low-profile gaiters
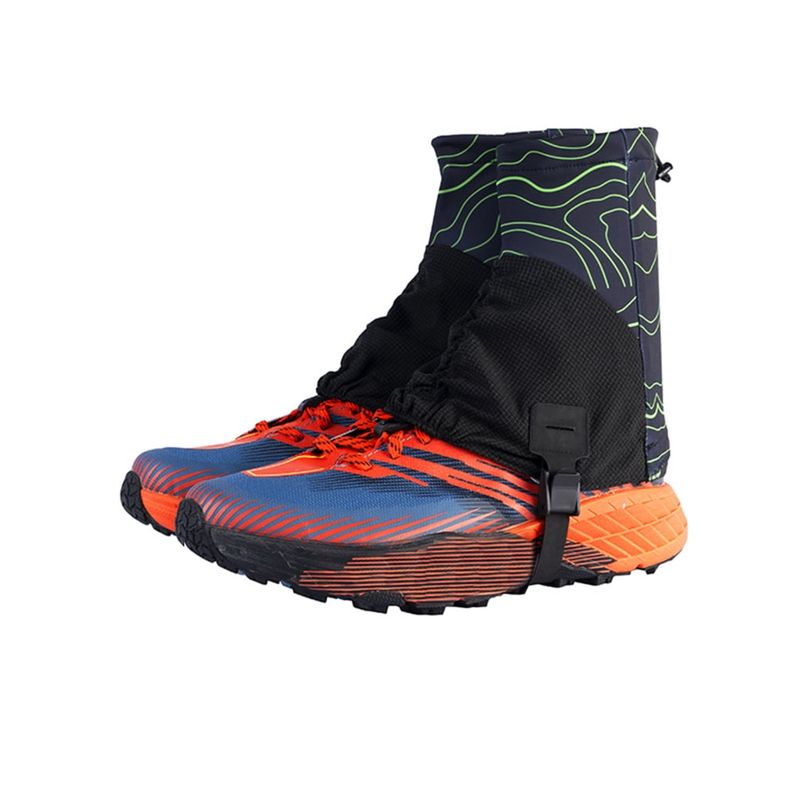
Short, durable gaiters keep gravel from grinding your heels raw and stop talus-born debris from undermining your footing. They also add a bit of tick and thorn defense when approaches cross brush. Pick an ankle-high, rock-focused pair that won’t trap heat.
Loose pebbles sneaking into your boots might seem minor until mile three, when every step feels like walking on marbles. Gaiters solve that annoyance before it starts.
Lightweight models pack small, weigh almost nothing, and deliver outsized comfort on long, gritty days. Your feet will thank you when you’re not stopping every twenty minutes to dump rocks.
7. The Ten Essentials—dialed for rock country
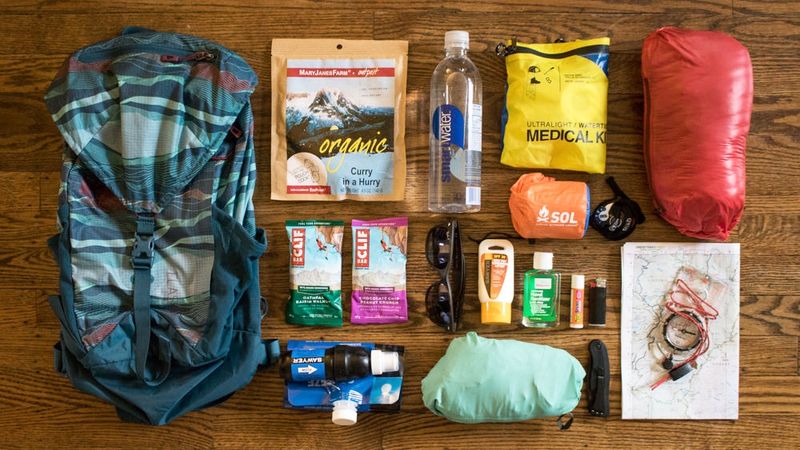
Even on a quick steep objective, carry the Ten Essentials: navigation, headlamp, sun protection, first aid, knife or tools, fire, shelter, extra food, extra water, and extra clothing. Add a compact emergency bivy and a means to purify water on hot, exposed ridges.
A personal locator beacon or satellite communicator is smart insurance where reception is spotty. Rocky terrain can turn ankles, delay progress, or force unplanned overnights.
Being prepared isn’t paranoia—it’s the difference between a manageable hiccup and a full-blown emergency when things go sideways in the backcountry.
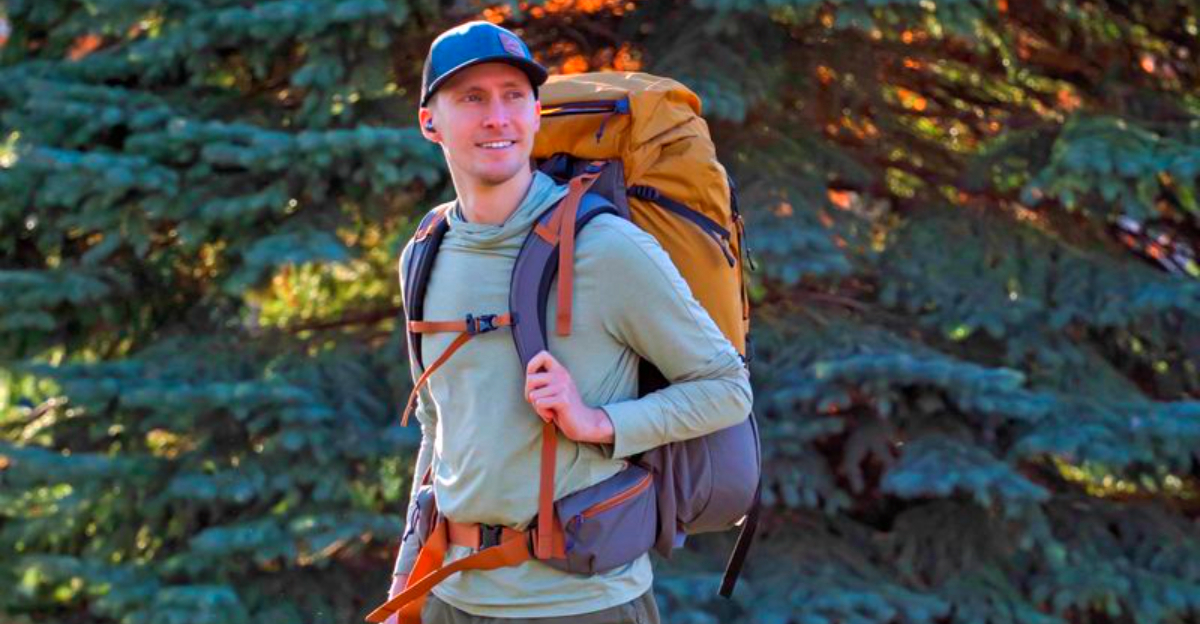
8. Pack that controls the load (so your feet can)
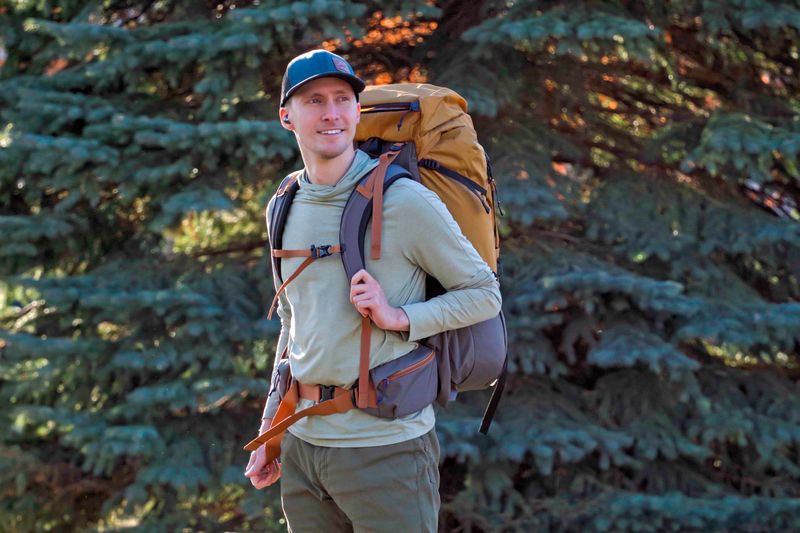
A properly fitted pack with a real hipbelt and functional load-lifters keeps your center of mass close on scrambles. Cinch it tight before boulder fields; loose, swinging weight magnifies stumbles on uneven stone.
This is practical technique aligned with pack-fit best practices: keep the mass high and close for scrambling moves. A wobbly pack throws off your balance precisely when you need precision footwork most.
Spend time dialing in your pack’s fit at home, adjusting straps until the load rides comfortably on your hips. On technical ground, that attention to detail pays dividends in stability and confidence.
9. Headlamp you can trust (and actually find)
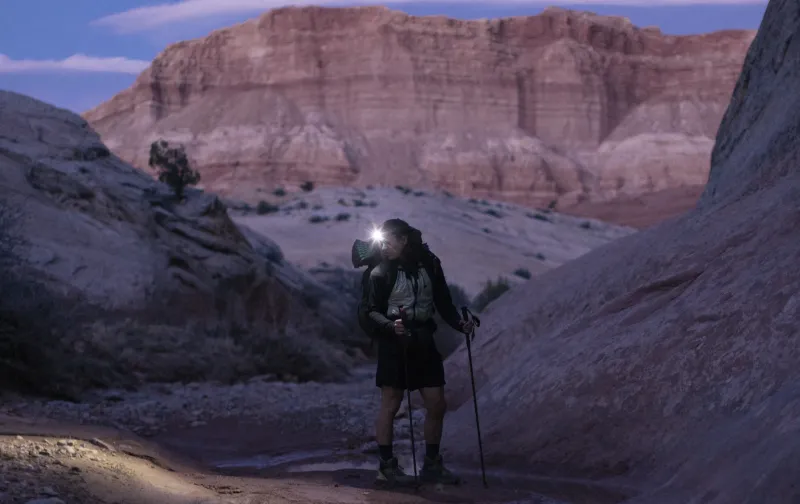
Ever tried fumbling through your pack in complete darkness while standing on loose rocks? A reliable headlamp transforms scary situations into manageable ones. Rocky trails don’t care if you planned to finish before sunset—weather changes, wrong turns, or slower-than-expected pace can leave you scrambling in fading light.
Choose a headlamp with at least 200 lumens and multiple brightness settings. Red light mode preserves night vision while checking maps. Keep it accessible in an outer pocket or attached to your pack strap, not buried at the bottom where you’ll never reach it when needed.
Fresh batteries are non-negotiable. Carry a spare set in a waterproof bag. Test your headlamp before every trip, even if you used it recently.
10. Footcare & first-aid that address the real risks
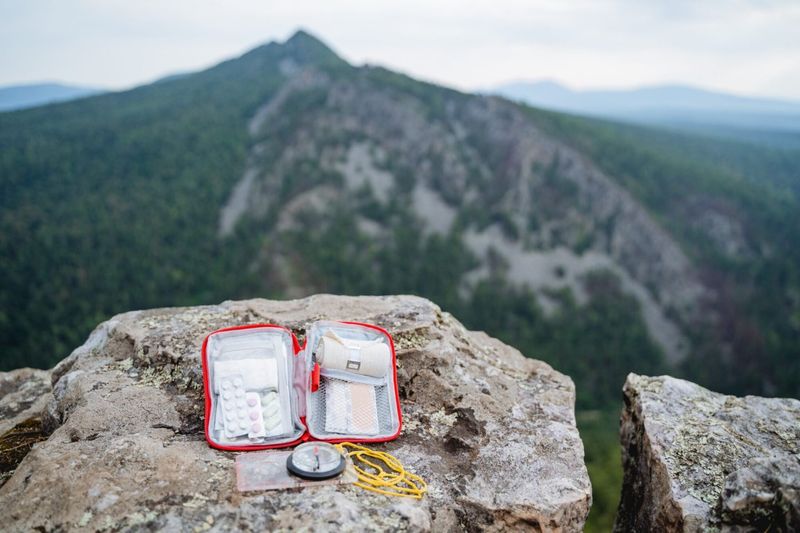
Blisters, twisted ankles, and scraped knees aren’t just possibilities on rocky terrain—they’re probabilities if you hike long enough. Standard first-aid kits often miss trail-specific needs. Athletic tape stabilizes wobbly ankles better than regular bandages. Moleskin prevents hot spots from becoming painful blisters that end your hike early.
Pack antiseptic wipes for cleaning cuts from sharp rocks. Include pain relievers for headaches or muscle soreness. Blister treatment supplies deserve their own small pouch for quick access. Don’t forget tweezers for removing splinters or debris from wounds.
Know how to use everything before emergencies strike. Practice wrapping an ankle or applying moleskin at home. Your feet carry you miles—protect them properly.